Wednesday, March 14, 2012

Mirror, Mirror On The Wall

Distressed, vintage furnishings are everywhere, or you may even see many reproductions at your favorite stores.  Each piece I find inspires me to get my hands dirty.  Here is one of my latest pieces.


I found this vintage mirror at a garage sale in pieces.  However, I fell in love with the carvings and knew right away I could save it.


This was so much fun to do especially the distressing part of the project! 

This piece is for sale, please contact me if you are interested.  Thanks again for stopping by!

I am linking to the following:

Monday, March 12, 2012

Thrifty Ribbon Organizer

While I was rearranging my son's art and activities cabinet today, I came across a plastic pail that was no longer needed.  It was once a home for some of his activities and I was getting ready to toss it into the recyclables and then it struck me.... Ribbon organizer!  Here is what I came up with in a short afternoon break.


Now I have a few ribbon organizers already...


 and the shutter..


and the homemade hurricane lamp...


But I needed an organizer for the ribbon still on a roll and without a hole to hang the roll from.  Like these...


I was tired of seeing them just sit on the shelf, hidden and not used.  So by cutting holes in the lid...


I repurposed a everyday item into a very useful storage container.


Thursday, March 8, 2012

Rustic Chic Wine Glass Holder

While visiting my latest addiction, Pinterest, I came across this super rustic chic idea, a rake wine glass holder!  What a great idea for a small space, functional, trendy, brilliant!  I filed it away in my "Ideas That Inspire" and left it at that.

Earlier this week, I began to do my spring clean up in the yard and wouldn't you know, my rake broke.  I threw it in the garbage can and then had a second thought, I could repurpose!


It is the perfect size to hang under your kitchen cabinets, or on a wall over a beverage cart.  My husband also came up with an idea, ribbon organizer for your scrapbook room!  Isn't he clever!?! 

This piece is FOR SALE, let me know if you are interested in it.  And remember to repurpose, repurpose, repurpose!!!

I am linking back to The Vintage Farmhouse, head on over and visit this shabby chic blog!

Tuesday, March 6, 2012

National Frozen Food Day

Is your life as busy as mine???  Some days just getting a dinner prepared and on the table seems more like an episode from "A Minute To Win It".  Being that I would rather prepare a healthy, fresh meal out of my own kitchen than out of a box, freezing the extras is a must for those days when we have ballet lessons, tap lessons, cello practice, homework, church, dentist appointments, etc.  This was my day a couple of weeks ago, and could not fit anything else into that day, whew!  To ease this busy lifestyle of our family is simple, when preparing a meal, double or triple the recipe and freeze the extras for another day (this really does not take any additional time, but saves you a lot of precious time later).  Here is a great place to find those perfect freezer recipes, onceamonthmom.com.  In addition, they are celebrating National Frozen Food Day!  With the fun (and addiction) of Pinterest, you will be able to share, view, add your own favorites.  Go ahead, get started, and have some fun with all of us today!!!  Hope to see you there!

Saturday, March 3, 2012

Come On In

The carpet has been installed and I was able to take some pictures this morning.  I am so pleased with the outcome of this project.  The paint samples hung in our foyer for months before I started, showing all of our guests my thoughts and ideas, imagining what I wanted and hoping it would all come together in the end.  And...


it did!

I was hoping for some more morning light, but I missed that opportunity, so the pics are a little darker than what it actually is. 


In case you have missed the previous posts, here is the before...


You have probably noticed that there is very little decor in my after pics.  I am working on that, but you will have to check back to see how I tackle the challenge of decorating this space.  Ideas have been running rapid and I can't wait! 

Friday, March 2, 2012

Vintage Chalkboard Fun

I am really loving the new rave, shabby chic chalkboards.  They are beautiful, colorful decor that can be used anywhere from a kitchen to a formal living room.  You can write your menus, favorite quotes, or chalk out a faux clock.  I have seen so many unique displays and I want to try them all.  One of my favorite inspirations is Pottery Barn, oh how I wish I could go on an all expense paid shopping spree.  But since reality far out weighs my wishes, I have to choose the knock off path.  Not that this upsets me, I love getting my hands dirty, tee hee hee!

Here is my first project, love, love, LOVE how this turned out!!!


I especially am thrilled with the vintage touch that came through.


Antiqued perfectly!!!

Here is the before, I received this mirror from my in-laws, it had been hanging in their garage for years.  I couldn't resist the beautiful curves and scrolls...


I took this pic outside before I started spray painting it, can you tell by the reflection in the mirror it was one of those beautiful, not-a-cloud-in-the-sky kind of days?!?  We have had the best weather lately, perfect 70 degree days, great for painting outside!

I have a couple more in the process, not quite finished.  I am playing around with a combo of paint and stain, to give the perfect vintage feel.

Now, the carpet is being installed right now.  I am hoping to post the final foyer pics later today if the lighting is still good in foyer when they finish.  If not, watch for the post early next week!

Get inspired and have a great weekend!!!

I am linking back to the following, please visit these amazing blogs!


Tuesday, February 28, 2012

Work In Progress

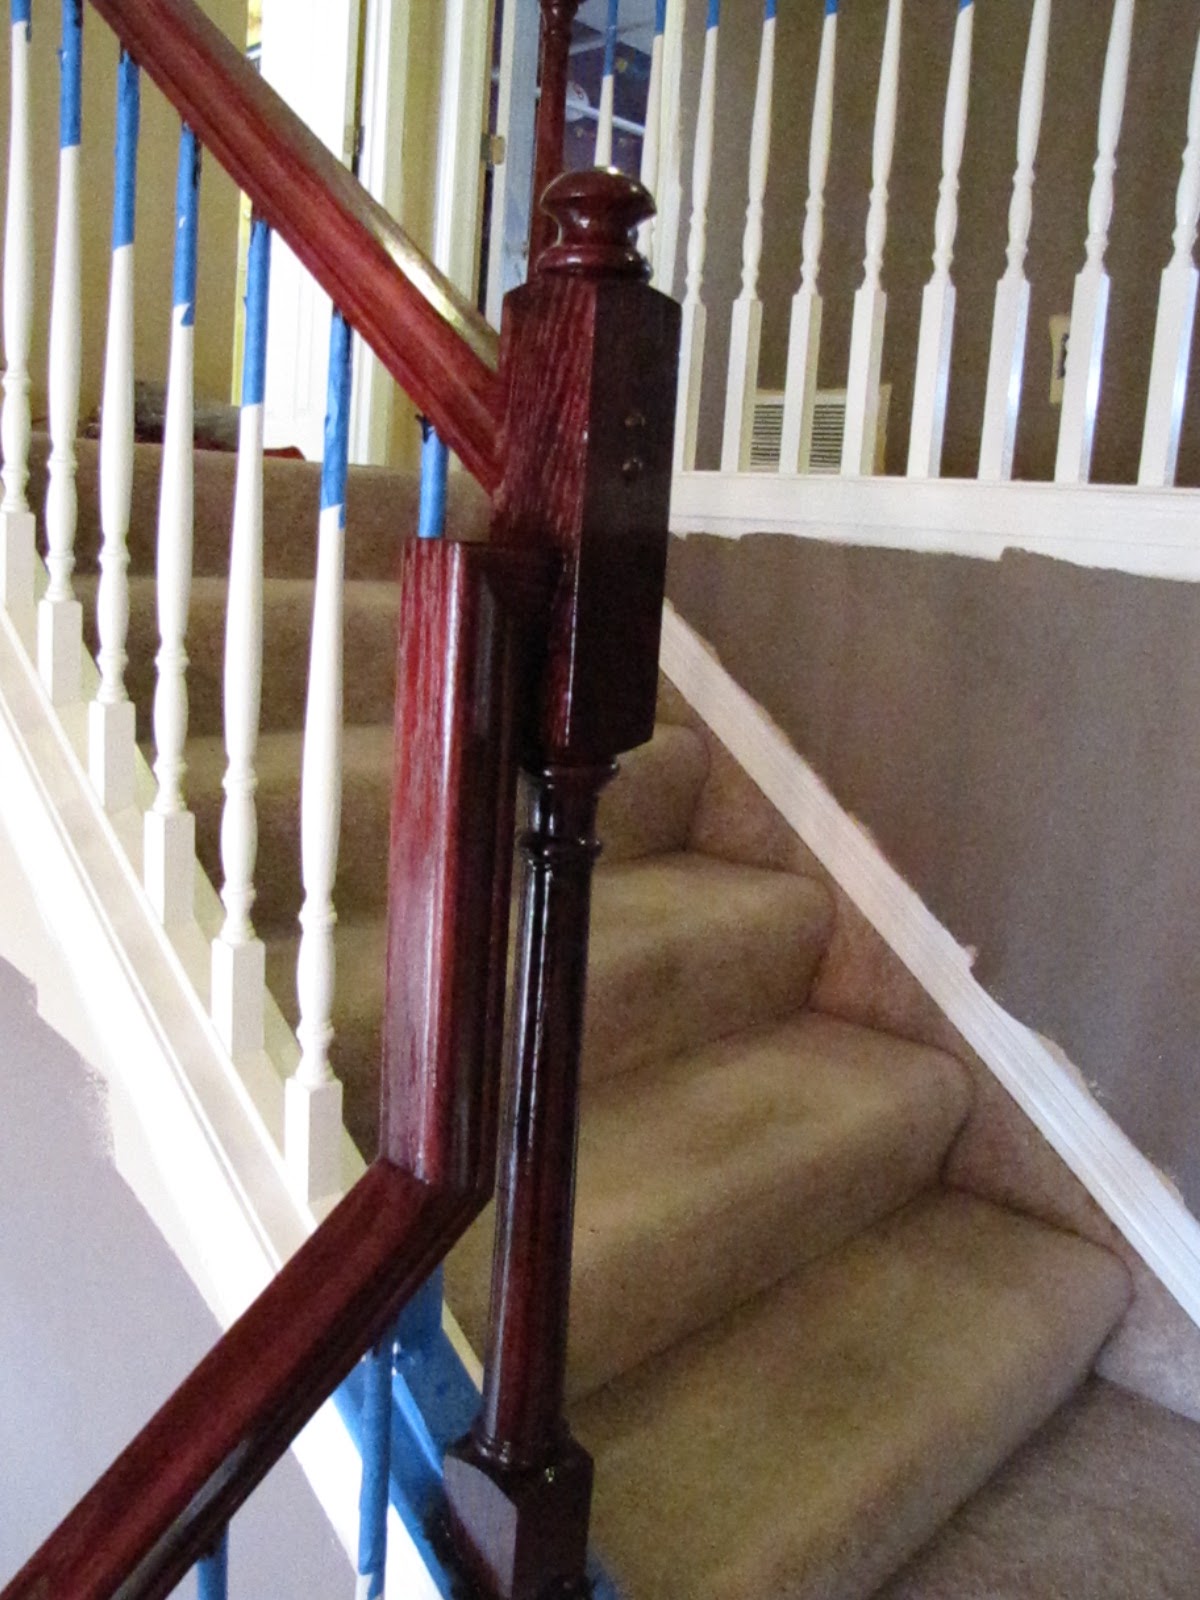
I have recently pushed myself into a project that was very intimidating to me.  Mostly due to the fact I have no prior experience with any of it.  The project included stripping wood, sanding, staining wood, and varnishing wood.  I knew exactly what I wanted the finished project to look like, and I had to do it as frugal as possible. 

Here is before:


First was stripping the wood work. This was the messiest part, but quite the learning experience. Once I found my groove, it wasn't as difficult as I thought it would be.  After the banister and all the end posts were stripped, each spindle needed primed and painted.  I used a one inch sponge brush to apply one coat of primer and two coats of paint on SEVENTY SIX spindles.  This was not difficult at all, just tedious.  As a reminder, the side of the spindles and banister that can be seen most often is on the backside of the staircase, in other words, to paint, strip, sand, stain, etc. you can only do so by leaning over the banister or by an extension ladder (a step ladder was too short).  Therefore, most of what I did, I did by hanging upside down over the banister.  What a sight, fortunately there are no pictures of this, lol!


And along the way, there were some boo boos...


I accidentally spilled a gallon of chocolate colored paint and then a couple of weeks later, near the same spot, I dipped a majority of my hair into the stain and drizzled it on the carpet.  Being accident prone, this did not surprise my husband (who is a neat freak) one bit.  Luckily new carpet had already been picked out.


This is what I will leave you with.  Carpet will be installed Friday, and then I will post the pics of my final foyer project.