Friday, February 18, 2011

Very Proud Parents!

Another project has occupied our time here at home this week.  Our eldest had her first Science Fair at her new school which involved the third through sixth grades.  My husband and I have never attended or participated in a science fair, so this was going to be a learning experience for all.  She had an idea of comparing and measuring the flight distances of three different paper airplanes with the only difference between them would be the type of paper (copy paper, card stock, and cardboard).   Being the happy-go-lucky child she is, her excitement for the project never ended.  She never grew tired of the long hours, no complaining, and she stayed very focused on the final project.  As the end was drawing closer, we explained to her that this would be her "practice" year since none of us knew what to expect or what was expected.  Knowing that the other students had been through this year after year and had a lot more practice and knowledge of the competition, we promised her we would come out of this with lots of ideas for the next year.  She understood, but still had the dream of coming home with that First Place ribbon.

Then it was time to take the project board to school to be judged.  She marched in with her prepared board with so much confidence, while I looked around the room and noticed her board was definitely different from the others and my heart was sinking fast.  What had we done?  We made her prepare it exactly as the directions told her to.  But I had to remind myself that this was her "practice" year and she was very proud of her project and that was the most important thing.  Plus, I was so proud of the effort and time she had put into this. 

The next day was the Science Fair Open House and Award Ceremony.  Her excitement was building.  All the proud family members were there to encourage and show their support for all their young scientists.  The room was filled with smiles and eagerness to learn the results. 
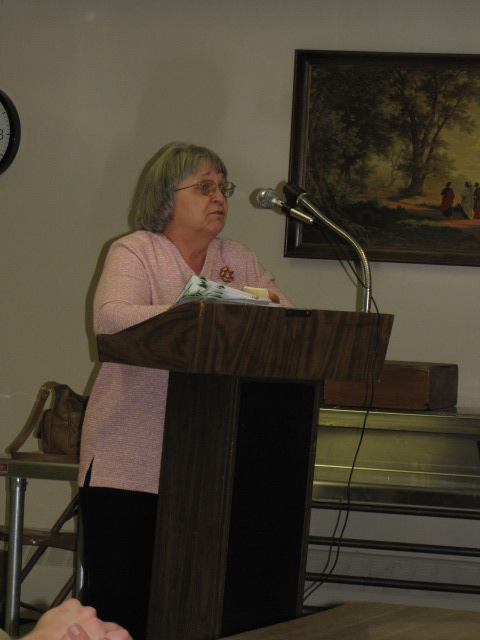

Her science teacher started out by announcing the participants first then moved to the ribbon winners.  Our daughter's name hadn't been announced yet, and they were announcing Honorable Mention.  This award was a tie, surely she would be one of them.  I clinched my camera closer, and her name wasn't called for either of those.  Now it's time for the Third Place to be announced, no, it wasn't her either.  Okay, two more students left, her best friend and herself, Second place winner was... her best friend.  The only student left was our (now beaming) daughter.  Tears started building in my eyes, trying to hold them back long enough to take the picture of her award acceptance.  She had WON!!!

 I can not explain how proud we were of her, and the excitement we felt, even now, I am tearing up again just thinking of that moment.  Our daughter is the type of student who has to work extra hard to keep an above average grade, school does not come easy to her at all.  And her hard work finally paid off!  Time to celebrate!  Ice cream at Braum's!!!
And finally, here she is posing with her big Blue Ribbon!

I am very proud of the little lady you have become!  I love you Baby Girl!!!

Thursday, February 10, 2011

The Formal Dining Room Makeover

I have neglected my blog recently and I apologize.  We have had a few snow days which means those days have been spent with the kiddos, we LOVE being snowed in!!!  However, I have something exciting to share with you, our new formal dining room.  Here is a before picture.
I started by stripping the wallpaper with the steamer I purchased this past summer.  There are several rooms in our home that are papered and it was a great investment.  Using a steamer is the fastest, easiest way I have found to strip wallpaper.  Trust me, I have taken off a lot of wallpaper in the past!

A deep burgundy was painted below the chair rail.  I started with 2 coats of primer, then finished with 2 coats of paint.  Little by little, I have been refinishing the woodwork throughout the home.  For the woodwork, I used 2 coats of primer and paint as well.


Are you ready to see the finished project???  Drum roll, please...


I painted the tray ceiling the same color as the walls, I loved how it turned out, it gave a lot of (much needed) dimension to the small room.
While I was in the middle of this project, my little one and I took a "field trip" to my new favorite place, Goodwill.  I try to repurpose as much as possible and well, I just love the hunt and finding treasures.  Look at what I found.

I found the pair for $4.99.  I fell in love with them right away, look at the clean lines.  Beautiful!!!

I also found a vase at Goodwill for $.99 and a candlestick holder for the same price at the Dollar General.  And with some Gorilla Glue this is what I came up with, a hurricane lamp for $2.00!

Now the wow factor, this makeover was done for around $50.00!  I already had the primer and creamy white paint for the woodwork and bottom half of the room.  I always use the same paint and primer for my woodwork in the home, it allows the rooms to flow together and is easier on the pocket book!  With taking care of your paint brushes, drop clothes, and other miscellaneous painting tools, you never have to endure those costs again.  I have had the same paint brush since 2008, and it has been used for a chocolate brown room, a steel blue room, bright purple and lime green room, and not to forget about the stark red and yellow Mickey Mouse room.  Reuse what you have and repurpose those treasures you find.

Now, your turn, take the next step to a stunning makeover in your own home!

Thanks for stopping by!

I am linking back to the following beautiful blogs:


Wednesday, January 26, 2011

No Fuss 20 Minute Layout

If you scrapbook like me, you have tons of pictures that have never been scrapped.  Correct???  Well, today I am showing you a VERY quick and easy layout you can use for any occasion. 
I used two 4 x 6 pictures, the vertical picture I did not cut down, however, the horizontal picture I did.  The paper already had the cute gingerbread men printed on the bottom.  The first thing I did was the "Sweets" backdrop for the first picture.  Using my Gypsy, I worked with the Plantin Schoolbook cartridge and welded the letters to a rectangle which created a cute mat for this picture.  You wouldn't have to use the Gypsy and weld this, just simply overlap the letters and glue to your rectangular mat.
I then wanted to enhance the horizontal picture with a mat and the green polka dot paper was perfect for this.  Since we are "scrap"bookers, USE YOUR SCRAPS!  I made the green polka dot mat out of the paper I used to cut the letters out with.
The rolling pin and ladle came from the "A Child's Year" cart.  This has to be my most favorite cartridge!  I did no manipulation to either of those.  Very cute accent to the page, huh?!?  The journal box is part of the same collection as the paper.  Once again, if you don't journal on every page, START!!!  Journaling is a very personal touch to an already personal page.  You do not have to hand write all your journaling (although it is the best - trust me), use the text from your computer and have fun with it!
Try this layout or make it a double page layout and let me know how it works for you, it does not take a lot of time at all.  I believe it took longer to post this than it did me to scrap this page, lol. 

Once again, scrapbooking is fun, enjoy it!

Friday, January 21, 2011

For My Friend...

I received a phone call from a very dear friend back home the other day.  This friend and I share many of the same loves and passions, God, family, friends, and SCRAPBOOKING.  She wanted a new tool that recently came out in the scrapbooking world.  With this tool, you can make many differents flowers out of paper.  I told her that I would take a look at this tool, do some research and let her know my thoughts.  After searching the internet and viewing this product, I told her not to waste her money.  In my opinion, since she already has the Cricut Expression, she should invest in the Gypsy.  Several Cricut cartridges offer many different types of flowers, and with the Gypsy you can manipulate them to your specific want and need. 

Of course, she wanted the "how to's" of how to make such a flower.  I had made a flower with a techinique I found on YouTube last Spring, right before we moved.  The flower is most commonly known as the "Tim Holtz Grungeboard flower".  I made the flower once and had not been back to practice and better that technique.  You can find a great tutorial here.  There are many different tuturials and techniques on YouTube.  Take some time, view a few, and find the one you feel most comfortable with.  

I started with my Plantin Schoolbook cartridge and used the flower found on this cart.  Then I cut three of these out at 3 inches each. 
The next step required the first flower to be sliced once to the middle in between two petals, the next flower required the removal of one petal, and the third flower required the removal of two petals.

Now here is when the fun begins.  Take your favorite quick drying adhesive, I used my trusty Inkssentials Glossy Accents, and start overlapping the petals and glueing them together.

Next, take a small cylinder shaped item and  roll the petals around it.
After each petal is rolled they should look something like this.
After you stack and glue each together, they will resemble a beautiful rose.  When I do this, I do all my Glimmer Misting before and enhance with Stickles by Ranger after.  Here is what I came up with.

The more you practice these flowers, the better the outcome.  So I encourage each of you to give it a try, this took me approximately 15 minutes to do start to finish, and it is only my second time making it.  Imagine the beauties you can come up with on a Saturday afternoon!

Have a great weekend everyone!  Miss you Jaeka!

Wednesday, January 19, 2011

You're The Best!

Is everyone snuggled in and keeping out of the cold weather?  We have gotten a little chilly here, but not as bad as our friends and family back home. 

I have needed to make some Thank You cards.  While our eldest was getting ready for school, I grabbed that good ol' Gypsy and started creating.  Before you know it, I had a very cute card waiting to cut, and why stop at just one, let's make it four!  Let's use different papers, patterns, and colors!  Woo hoo!  Are you as excited as I am???  Here they are!

I used the Plantin Schoolbook, Stretch Your Imagination, and Lyrical Letters cartridges.  The paper is mainly K & Company's Amy Butler's Sola collection.  I have added some Bazzil, I use their cardstock for most of my cards.

This sentiment came from the Lyrical Letters cart as well as the canary.  I inked the pink gingham with Tim Holtz Distress Ink Antique Linen.  It gave the gingham more texture and subtlety.  I applied the ink with my new Tim Holtz Blending Tool and was very happy with the application. 
The frame of the card came from the Stretch Your Imagination cart.  It needed altering because I wanted the cards to be a normal A2 size.  I then added a rectangle from the Plantin Schoolbook cart, and along with the sentiment, I grouped them all and welded the entire card on the Gypsy.

I hope I have inspired your creative side! Thank you for stopping by, You're The Best!

Friday, January 14, 2011

Remembering The Snow

My daughter loves the snow and to her amazement we finally received a snowfall this past week.  However, the accumulation was disappointing for her, it wasn't what she is accustomed to.  Back home, she would take her sled to school and enjoy sledding for weeks, we would have had a chance to build a gigantic snowman, and you can't forget the inevitable school cancellations, dismissals, and late start due to the impact of snow.  As I type this, I look out the window and see just patches of snow left, most of it has melted away.  And now, our less hopeful daughter has put away her snow pants, reluctantly.  In a chance to cheer her up, I went through the ever growing pile of pictures that needs scrapped, and found a few from one of our blizzards last year.  I also grabbed my ever growing pile of Scrapbooks, etc. magazine, which influence me greatly to scrap, and found the perfect layout in the February 2010 edition.  This is what I came up with.


I loved the stitching that was used in my "scrap lifted" layout, so I made sure to incorporate stitching in this layout.  I know nothing about sewing, so I always drag my feet when it comes to applying this technique to my pages, although I am always pleased with the turn out.  Here is another look at the stitching, such a simple way to apply yet another texture to any page.
Note the journaling, in the past I hesitated to place any journaling on a page because, like everyone else, I am not pleased with my handwriting on my pages.  So, therefore, I force myself to do this on just about every page I scrap.  It puts a very personal touch to every page, and makes them extra special. 
I then grabbed my Gypsy to create different snowflakes, these were found on the "A Child's Year" cart and "Christmas" cart.  There was no alteration necessary, but I was able to cut the snowflakes all at once without changing the cartridges.

Well, this is how I spent my Friday afternoon, with a finished project, I am very pleased and ready to jump into the weekend now.  Have a great weekend!  Thanks for visiting!!!


Wednesday, January 12, 2011

Welcome Home

Today we are awaiting the arrival of Daddy.  He has been gone for three days, which to us seems like three months!  We have missed him dearly!!!  He is flying home from sunny California, and he will be met by very low temperatures and snow.  Here is a picture of our backyard as of this afternoon.

For Daddy's return, I decided to make him a card.  I have been thumbing over and over again through my latest copy of Scrapbooks etc. magazine.  This issue is stuffed full of great ideas!  I can't get enough of it!


Grab and copy, you will not be sorry.  What I love about this magazine, in particular, it is for the beginner to the advanced scrapbooker. 

After turning the first page, I was inspired right away.  Look at this, it is an advertisement for eclips, so I decided to do what I do best and "scrap lift" this idea.

So I grabbed my newest love, the Gypsy, and started creating.  I also wanted to incorporate my Tattered Angels Glimmer Glam which Santa had placed in my stocking.  Aren't these colors pretty???
If you haven't seen or even heard of the Gypsy before, here is a quick rundown.  It is made by Provocraft and allows you to design for your Cricut, no matter what type of Cricut you have.  It is a handheld device and you can upload all your Cricut cartridges to it and design with any or all at one time.  This is similar to the Design Studio.  For my card, I used the Gypsy Wanderings cart (which comes with the Gypsy) and the Storybook cart (this is in fact one of my favorite carts!).  Here it is...

What do you think? 

Thanks for taking a peek!